
Create a case

  1. Open Cases and select Add Case.
  2. Choose the client. Create the client first when they do not yet have a record.
  3. Enter a clear case name and select the case type that matches the application workflow.
  4. Add assignees who need access to the work.
  5. Create the case.
Choose the case type carefully: it determines the available questionnaire, document requests, and any supported autofill workflow. If the application path is uncertain, create the client and lead first rather than starting an incorrect case.

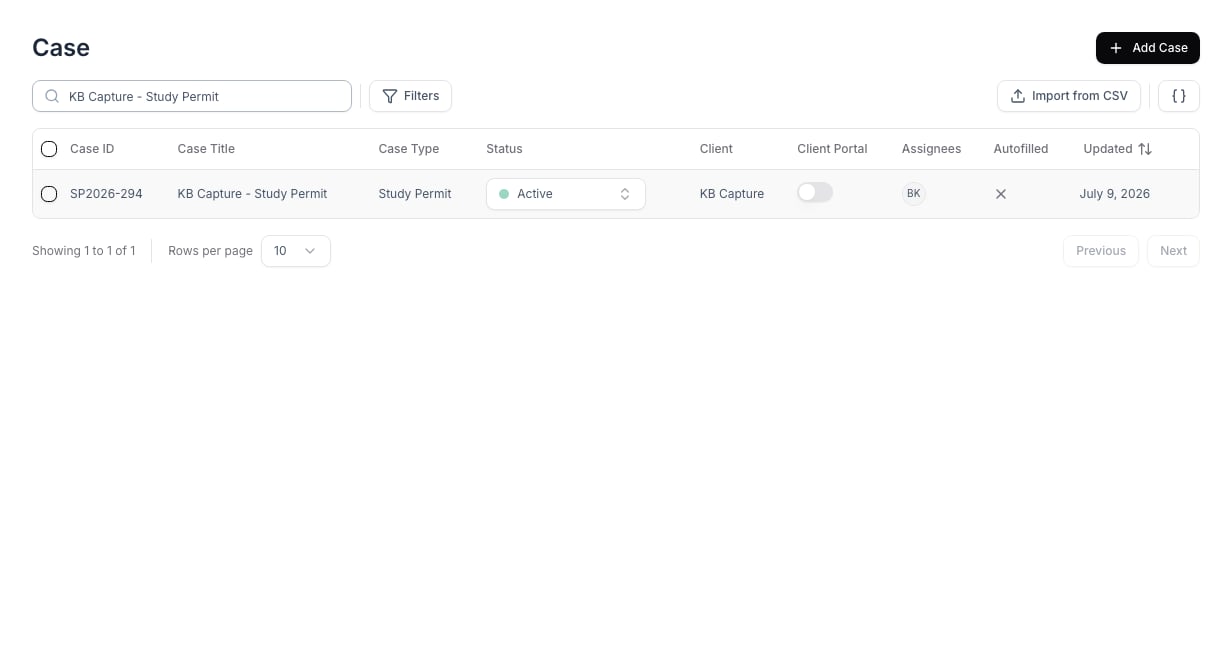
Find and review a case

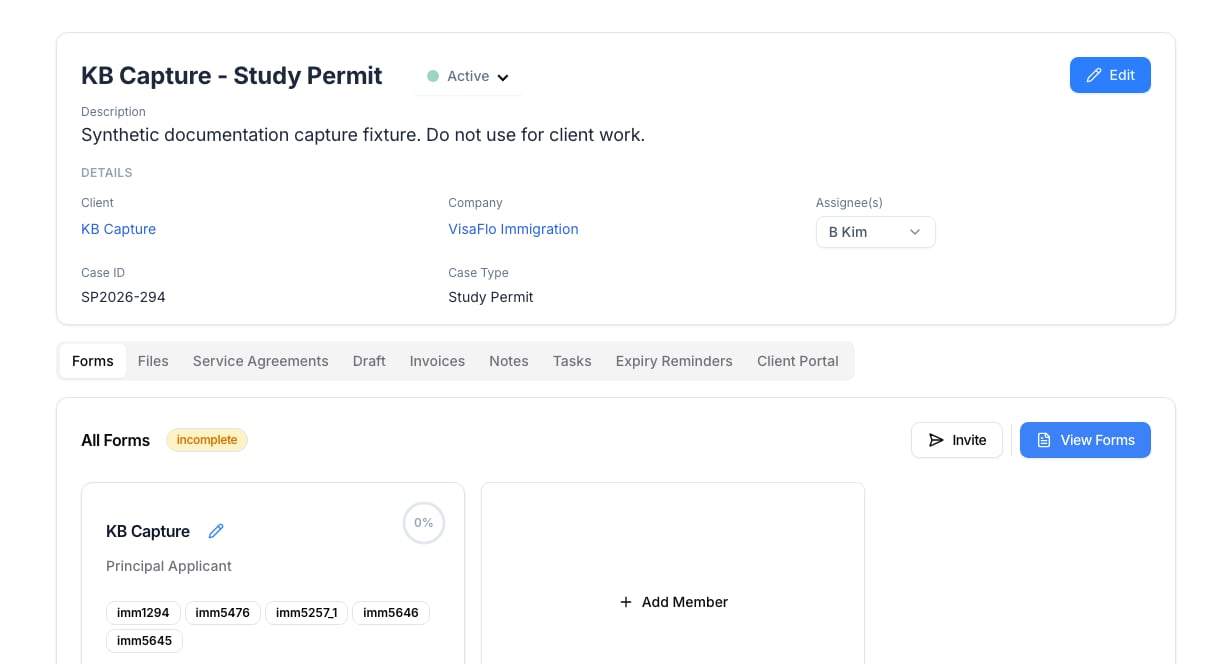
Use Cases to search by case ID or title, check the current status, and confirm the linked client before opening a record. Filtered case list showing a created case After creation, confirm the client, case type, assignees, and generated case ID before inviting the client or opening the forms. Created case showing the case summary and Forms tab
Next steps

  • Use Forms to review the intake and send a client invitation when the questionnaire is ready.
  • Use Files to organize supporting documents.
  • Use Tasks and Reminders for internal deadlines.
  • Turn on Client Portal visibility only when the case is ready for the client to see.

Troubleshooting

If you selected the wrong case type, review the case before sending any invitation or generating documents. If the case should use a different intake or portal workflow, correct it with your firm lead before entering substantive client data.